 Lynden Window
 Why Siding Takes a Beating in Aldergrove, BC
Aldergrove sits in the stretch of the Fraser Valley where marine air off the Salish Sea meets rain that pushes in off the Pacific and stalls against the foothills. Homes here deal with a combination most siding products were never engineered for: salt-laden air that accelerates corrosion on fasteners and trim, driving rain that gets forced sideways into laps and seams instead of simply running down the face of a wall, and a moss season that can run from early fall through spring. That combination is why siding in this area tends to show real damage years before the same product would fail somewhere drier.
We're based just across the line in Lynden, in Whatcom County, and the weather pattern doesn't stop at the border. The failure points we see on a home in Aldergrove are almost always the same ones we see a few miles south — moisture finding a way behind the siding and having nowhere to go, because the wall system was never given a real chance to dry.
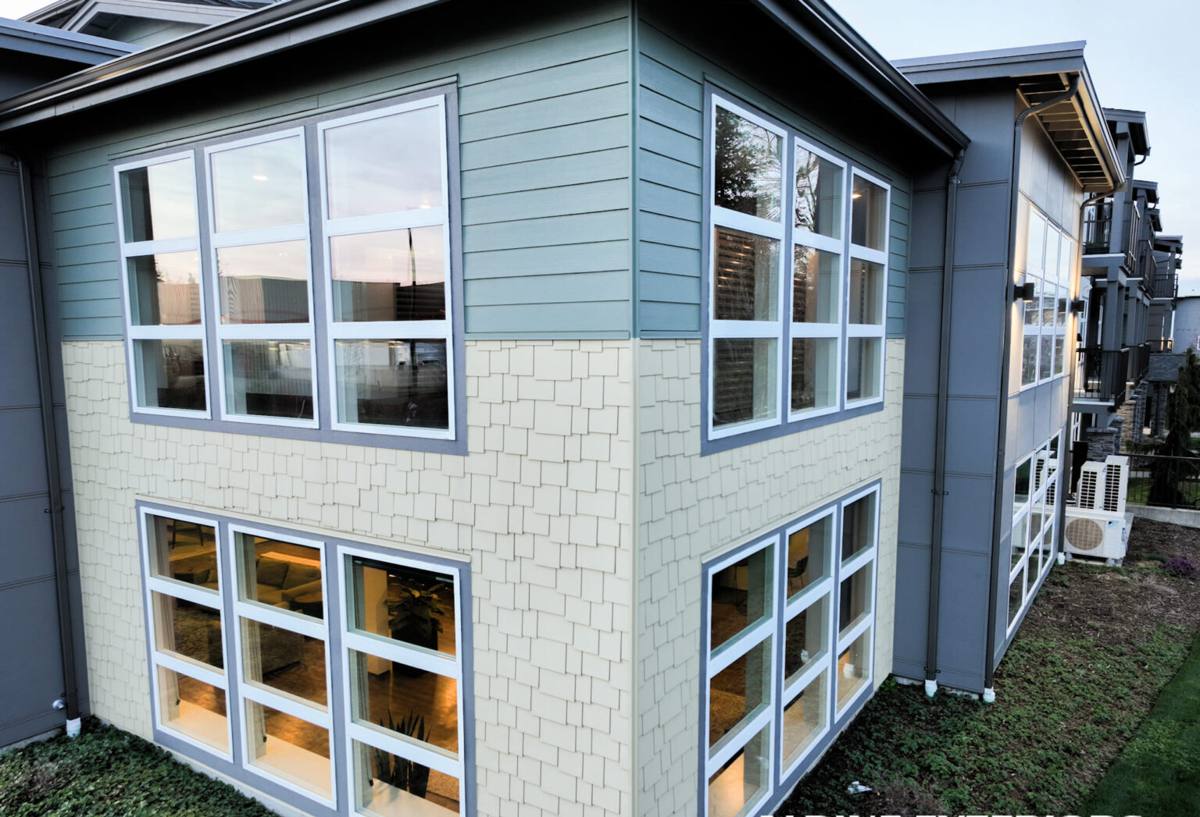
Signs Your Siding Needs Repair, Not Just Cleaning
A pressure wash and a fresh coat of paint can hide a lot, but they don't fix what's happening underneath. Before you spend money on cosmetic touch-ups, it's worth knowing which signs actually mean something structural is going on.
- Soft, spongy, or visibly bowed boards, especially near the bottom courses close to grade
- Paint that's bubbling or peeling in sheets rather than just fading or chalking
- Persistent green or black staining in shaded or north-facing areas that comes back quickly after cleaning
- Cracked, chipped, or split boards, particularly around corners, window trim, and utility penetrations
- Rust streaking below nail heads, hose bibs, or metal trim
- Gaps opening up at seams, corner boards, or where siding meets trim
- A musty smell or visible staining on interior walls that back up to exterior siding
Any one of these on its own might be minor. Several showing up in the same area, or repeat problems in the same spot year after year, usually means water has found a path in and the siding is only the symptom.
Repair or Replace? Reading the Signs
Not every problem area needs a full re-side, and not every stain is safe to just patch over. The table below covers what we typically find and how we usually handle it — though a proper diagnosis always requires opening the wall up, not just looking at the surface.
| What You're Seeing | Likely Cause | Usual Fix |
|---|---|---|
| Soft or spongy boards near the bottom edge | Trapped moisture, often from missing or failed flashing | Remove and replace the affected boards; correct the flashing underneath |
| Green or dark growth in shaded, north-facing sections | Persistent moisture and poor airflow during moss season | Clean and inspect; repair only if the boards underneath are still sound |
| Cracked or chipped boards near corners and windows | Impact damage or age-related brittleness in older siding | Spot replacement of the individual damaged boards |
| Rust streaking below nail heads or trim | Fasteners reacting to salt-laden coastal air | Re-fasten with corrosion-resistant hardware and patch the finish |
| Bubbling or peeling paint across large wall sections | Moisture pushing out from behind the siding, not a surface paint issue | Section removal to locate and correct the actual water source |
| Widespread soft boards across multiple walls | A systemic gap in the original water management, not a local failure | Full re-side is usually more cost-effective than repeated patching |
What a Correct Siding Repair Job Actually Involves
Diagnosing the Real Cause First
A repair that only replaces the damaged board and stops there is a temporary fix. If the water intrusion point isn't found and corrected — a gap in flashing, a caulked joint that should have been left to drain, a missing kick-out at a roof-wall intersection — the same spot fails again within a couple of seasons. Every repair we do starts with figuring out how the water actually got in, not just where it showed up.
Matching or Upgrading the Material
Patching in a mismatched product is one of the most common mistakes we see on repair jobs, whether it's a homeowner's DIY attempt or a quick job by a crew that just wanted to close out the invoice. Different siding materials expand, contract, and age at different rates, so a patch that doesn't match the surrounding material — even if it looks close on day one — often creates a new failure point at the seam.
Sealing, Flashing, and Water Management
The visible siding is the last layer, not the first line of defense. Proper repair work means restoring the house wrap or building paper behind the patch, correcting flashing at windows, doors, and horizontal trim, and making sure water that does get behind the cladding has a way out instead of a place to sit. Skipping this step is why so many "repairs" in this climate don't last.
Why We Repair — and Rebuild — With James Hardie Fiber Cement
We install one siding product: James Hardie fiber cement. That's true for full installs, and it shapes how we approach repairs too. When a section of siding needs to come off and go back on, we use HardiePlank or the matching HZ5 product engineered for this region's wind and moisture exposure, finished in factory-applied ColorPlus so the patch holds its color instead of fading or chalking at a different rate than the rest of the wall.
Fiber cement doesn't absorb and swell the way wood-based products can, and it doesn't rely on a paint film alone to keep moisture out the way some engineered wood siding does. That matters most in a repair scenario, because a repair patch sits at a seam — a place where two different pieces of material meet — and seams are exactly where marginal products fail first in driving rain. If your home currently has vinyl, LP SmartSide, cedar, or another cement board product, we'll be straight with you about what a Hardie patch involves: sometimes it blends in cleanly, and sometimes the smarter, more honest recommendation is planning a fuller re-side rather than mixing materials on one wall.
The Real Cost of Getting a Repair Wrong
A quick DIY patch or a rushed repair job usually costs less upfront and more over time. Trapped moisture behind mismatched or poorly sealed siding doesn't stay contained — it works into sheathing, framing, and insulation, turning a problem that would have cost a few hundred dollars to fix correctly into one that costs thousands once rot has spread. Small, isolated patch jobs on sound walls are typically the least expensive category of siding work; repairs that require removing multiple courses to trace a leak, or that reveal sheathing damage once boards come off, cost more because the scope grows with what's actually found. We'd rather tell you that upfront than surprise you mid-project.
Our Siding Repair Process
- On-site inspection. We look at the visible damage and check surrounding areas — corners, window trim, roof-wall intersections — for related issues that haven't shown up yet.
- Diagnosis before quoting. If we suspect trapped moisture, we'll pull a board or probe the area before giving you a final scope, so the quote reflects the actual repair rather than a guess.
- Straightforward estimate. You get a clear breakdown of what's being replaced, what's being resealed or reflashed, and why — not just a lump-sum number.
- Correct water management. Flashing, house wrap, and drainage details get fixed as part of the repair, not skipped to save time.
- Matched finish. Replacement boards are installed and finished so the repair blends with the surrounding siding as closely as the existing material allows.
Why Hire a Crew That Already Works in Aldergrove
Working on both sides of the border between Whatcom County and the Fraser Valley means we see the same weather-driven failure patterns repeatedly — which flashing details tend to get skipped on older builds, which wall orientations take the worst of the driving rain, and how fast moss reestablishes itself on a shaded elevation if it isn't addressed correctly the first time. That familiarity shortens the diagnosis step and helps us avoid the guesswork that turns a simple repair quote into a change order once the wall is opened up.
It also means we're not learning the regional climate on your project. A crew that mostly works drier inland conditions can reasonably miss the moisture patterns that are routine for us here.
Ready for a Straight Answer on Your Siding?
If you're seeing soft spots, staining, or recurring moss on your Aldergrove home and aren't sure whether it needs a simple patch or something more involved, we're happy to take a look. We'll give you an honest read on what's actually going on and what it would take to fix it right — no pressure, no upsell. Reach out using the form below for a free estimate.